top of page
Portfolio
Portfolio
Portfolio

Stretch and Squash
Team Project

Project Lead

Git and Version Control

Gameplay Programming

Trello Project Management
Enter a new age of science in this co-op platformer adventure playing as Stretch and Squash, slime bought to life by the Royal Plasma Institute
Project Time: 7 Weeks
Game Engine: Unreal
Team Size: 9
Winner at Falmouth Games Academy Expo 2024. Link to Certificate
Stretch can stretch over obstacles
Wire Puzzle: Stretch conducts the electricity of an object using the wire and squash activates it
Squash can suction to a corkscrew to lift it
Traversing the timed hydraulic press obstacle
Squash can fit into small gaps by reducing their size. The camera changes dynamically to assist their view
When Squash lays flat, they act as a bouncing pad for stretch
Death and Respawn Function
Squash suctions to rotating obstacles to get to a higher plane
Mechanical Overview
Overall Contribution
- All game mechanics and setup aside from tutorialisation
- Assisted the design with input from the whole team
- Focused on using C++ for a custom details panel and easy implementation by our designer
- Usage of Inheritance for player characters
- Mastered the usage of Blueprint Interfaces for Decoupling
- Assisted puzzle design, documentation and playtesting
- Directed art, audio and design.
- Adhered to Agile methodology by implementing changes based on sprint feedback/playtesting
- Emphasis on Game Feel with easy tactile controls
- Aside from these main mechanics, I also handled the game state, split screen controls, fmod audio integration and other miscellaneous things.
- Even though this was my first time making a project in Unreal, navigating unreal and blueprints became second nature to me.
- As the project progressed, I experimented more with using C++ in conjuction with blueprints; converting blueprints into script and vice versa.
- In future, I would like to use advanced C++ in a bigger project and use the Gameplay Ability System for creating smoother gameplay.
Click the button for an in - depth look at the systems I created and the problems I overcame this project.
Index Anchor
The wire puzzle was my introduction to blueprint interfaces. I wanted a way to link the actions of the players without needlessly exposing their blueprints to each other. Abstraction and Decoupling are important for making sure code can be changed without completely breaking apart other parts of code. I really enjoyed putting this mechanic together because it felt like everything was clicking together smoothly.
The main wire blueprint is converted from C++ that uses enums with a custom details panel for easy setup. The blueprint itself is just two collisions that are dropped onto the wires and modified:


Depending on the "Action Type". The variables of the wire change. Rotation is used for the fan and liftoff is used for gates but I had the future of the mechanic in mind and made them general actions that could be applied to a range of things.


Wire Puzzle Anchor
Each action type comes with a function. For example, liftoff is a lerp between the original actor location and the lift height set by a designer. The "TimeElapsedLift" is the amount of time the object has been lifting for and "LiftDuration" is the max time the lift should occur.
Dividing the current time by max time gives us the percentage progress that is used to interpolate the object smoothly each frame due to knowing where it should be at any given moment. Smoothing the action of the gates adds a nice feeling when puzzles are complete. I use the ease in out function to simulate the delay that usually occurs when heavy objects are lifted. I use a similar function for fan rotation.
When Stretch enters one of the wire collisions and starts stretching, as long as the anchor point stays there, stretching to the other collision will activate the wire. This sends a message to the button blueprint that makes it ready to press by Squash.
The main point of the lab wire puzzle is to activate objects that aid the players progression. For example, turning the fan on to blow stretch's obstacle away. In a full game, we would use this mechanic as a combination for powering several objects.
Stretching Anchor
In order to make the titular mechanic feel good, I wanted to simulate tension by slowing the character down as they reach their max stretch point which uses the distance between the player and the anchor on land and air.
Stretching works by using an anchor point that spawns another stretch character that cannot move. Then as the player character moves away, a modified cable component stretches between the two points. I did this so that when the player stretches in the air or stretches across a platform, they will always be weighed down by the anchor. When in the air, the anchor casts a raycast to the floor and is affected by gravity if there is no ground.
While stretching, the distance is calculated and player movement starts slowing down proportional to how close they are to the max distance. After playtesting, we found that having the player immediately slow down felt very restrictive so theres a threshold the player passes first before starting to slow down.
Both player characters use enum states to control the actions they take. In the stretching state, the jump button is converted to stretching up into the air. This cuts out the need to complicate things and prevent issues caused by switching inputs.

The retracting state begins after the player stops stretching. Stretch goes back to default when they reach the anchor again. When the player stops stretching, depending on the button they release first, they can either retract inwards which brings the anchor into stretch or retract backwards which brings stretch into the anchor. This gives the player options during platforming.
This mechanic is very simple. The corkscrew uses box collisions on either end to determine what state the corkscrew should be in upon entering and leaving. Creating finite state machines for mechanics that have lots of moving parts helped to keep everything stable. There are no interruptions in every lerp motion.

In order to make sure the corkscrew always ends in the right position, the transition to end state flicks the corkscrew into the direction it is facing. It uses the shortest possible distance that it needs. After that, it will wait for a time you set before going back down to give the players time to jump off.
Corkscrew Anchor
I ran into a surprising amount of trouble trying to attach the player to the hamster wheel to follow the motion. Whenever the player would get off the hamster wheel and de-attach, they would lose movement and jumping functions and I couldn't figure out why.
I reframed my perspective and decided to move the player along the rotation manually if the engine properties wouldn't work for me.
I did this by first getting the difference vector between the player's impact position on the wheel and the center of the wheel. I then rotated that vector around the wheel according to the wheels delta rotation in degrees.
However, I ran into an issue where the player would teleport to the current angle the wheel was at upon collision.
So to stop this, I would subtract the wheels current angle by itself to get a variable I called "rotation offset" which was always 0. This way, the delta rotation would always start from 0 and still increase based on the wheels rotation. The player could start at angle 180 degrees while the wheel is at 270 degrees for example and both rotations could increase independently of each other.
Hamster Wheel
Respawn
Weirdly enough, this was my first time ever attempting a respawn mechanic. I wanted to make it so that our designer could have full control of it. I just gave him the tools and he checked all the boxes.
This simple system is split into three interlocking parts. Respawn points, checkpoints and death zones. When a player enters a checkpoint collision it will activate the assigned death zones and deactive the previous checkpoint. Each death zone has assigned spawn points that can be set to be player specific. When a player dies, they will return to the closest spawn point.
Death zones will not activate till the player passes the checkpoint. This is because we had issues where a player could accidentally touch a death zone in the next section. We could have placed barriers between them but I wanted a system where there was a 100% guarantee that this couldn't happen. The hydraulic press just has a death zone at the top.
I really enjoy making systems like this for a designer run wild with. In my mind, its like handing them a cool new toy to manipulate to their liking.
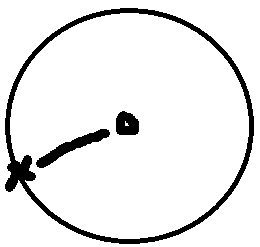
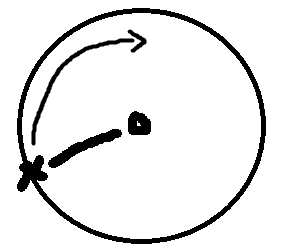
In every co-op game you need a way to locate the other player and I've provided just that. This player seek mechanic uses Cross Product to align your "sight" with the other player and will highlight them if there is any material blocking a line trace between your character and the other player.
Player Seek Anchor
This was one of my favourite mechanics to make due to how simple yet effective it is. The first hurdle I passed was converting the collision of the absorbed object so it doesn't collide with the player. This has three phases: absorption, calculation and shooting.
Absorption Anchor
The player activates absorption by getting close and holding the input. While held, the player needs to hold the input again to enter calculation phase which uses the amount of time the input is held to determine a distance multiplier which is added onto the camera's forward vector plus the players location to get a target direction and location to shoot the object to.
I wanted to create a standard parabola effect that you see when an object is thrown. At first I used a projectile motion equation to determine the x and y of the object. Initial velocity x Time x Cosine/Sine of the angle, subtracted by acceleration of gravity for y but I found that it wasn't creating the behaviour I wanted when using the mouse to determine the angle. It was a little too complicated.
So Instead, I disabled gravity and lerped the object to the location and direction determined by the player. When it reaches that location, it enables gravity again which creates the illusion of a parabola effect. Right now this is only used for buttons but in the future of the mechanic, I could see us doing puzzles that required throwing objects into certain places. I also made it possible to absorb stretch in this way too for fun.
Documentation
As part of the project, we were required to form a pitch. On the left is an initial documentation I wrote with a designer and on the right our final pitch created using the documentation as a basis.
bottom of page